To create a new menu :
- Navigate to Appearance > Menus.
- Click on Create a new menu, give the menu a name.
- Now to the left are available menu items that can be added to the screen, check the items you want to add and click on Add to Menu button.
- The items are now added to Menu, you can then sort and lay the menu items in levels by drag and drop.
- Click on Save Menu.
- After you have saved the menu, hook the menu to any of the available Front Nav menu locations.
Enabling Static Content Blocks, CSS Classes from Screen Options
By default CSS Classes field, Static Content Blocks menu items may not be available. The will have to be enabled. To enable it please click on Screen Options at the top right screen of Appearance > Menus page. In the pull down menu that appears, check CSS Classes in Show Advanced menu properties. Please also check Static Content Blocks in Boxes. We’ve explained it in the screenshot below.

Add Icons to Menu items
Output
Settings
- Navigate to Appearance > Menus.
- Click on the caret on the top-right of menu item that contains the megamenu subitem to expand it.
- In the Icon Class text box, enter the icon name as you wish. For ex: ec ec-map-pointer.
- Click on Save Menu.
Making the megamenu dropdown as full-width
Output

Settings
The megamenu now looks advanced and neat. What if we want the megamenu to be full width ? It is easy.
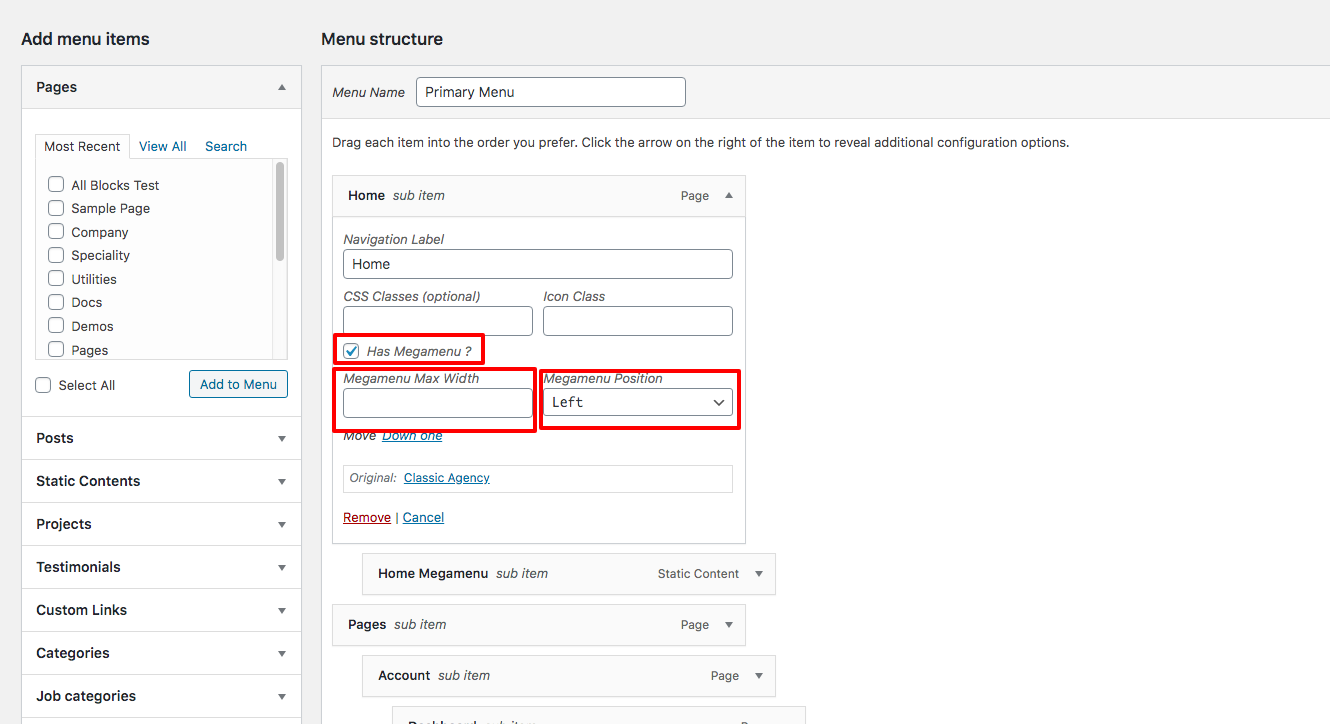
- Go back to Appearance > Menus.
- Click on the caret on the top-right of menu item that contains the megamenu subitem to expand it.
- Check the Has Megamenu? box to enable megamenu.
- Please add width in Megamenu Max Width box. Leave empty for fullwidth megamenu.
- Please select Megamenu Position when not fullwidth megamenu.
- Click on Save Menu.