Setting Home & Blog Page
Sinbad comes with 3 different types of Home Pages. By default the home pages are built using Page templates. However it is also possible to build the home pages entirely with King Composer or Visual Composer. Please follow the steps below to assign one of the 3 home pages as your website’s home page.
By default, WordPress displays blog posts in the home page but we will display a static page as our home page.
- Navigate to Pages in your WordPress admin menu to make sure all pages have been imported.
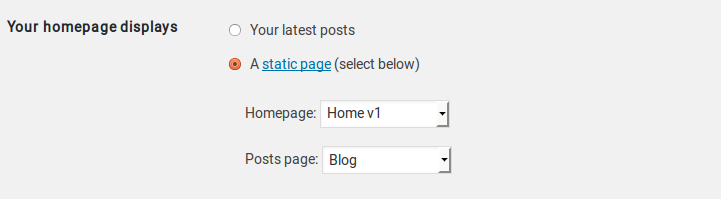
- Navigate to Settings > Reading and choose A static page radio button option for Front page displays settings.
- For Front Page, choose any one of the 3 home pages that was imported. In our theme we choose Home v1 as our Front Page
- For Posts Page, choose Blog page as your posts page.
We’ll create the contents of the Blog and Home page later.
Other General Setup
WooCommerce Setup
Click here to assign WooCommerce Pages.
Adding Products
Now that we’ve configured the general settings of the theme, its time for the fun stuff, adding your products! But before diving into your first product you should familiarise yourself with how product categories, tags and attributes work. Read in detail about adding and managing products using WooCommerce here : http://docs.woothemes.com/document/managing-products/
While adding products, Sinbad theme allows you to add additional information to the products, that additional information is Product Attributes. Read about managing Product Attributes by clicking here.
Product Archive/ Shop Page
After adding the products, you need to configure how the product items are displayed : Click here to know more about that.
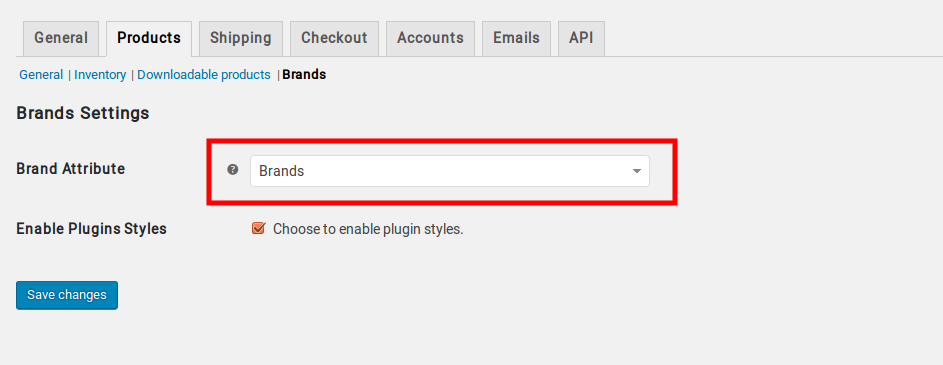
Assign Brand Attribute
Navigate to WooCommerce > Settings > Products > Brands here choose Brands for Brand Attribute to display Brands on your page.
Read about managing Product Attributes by Clicking here.
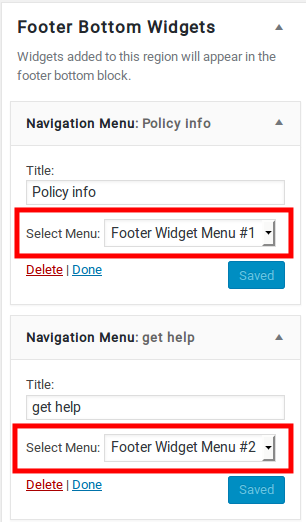
Assigning Widgets
Navigate to Appearance > Widgets here assign Footer Widget Menu #1 menu for Policy Info Navigation Menu and choose Footer Widget Menu #2 for Get Help Naivgation Mneu.
Click here to know more details about Widgets.
Blog Page
After the shop page, we’ll configure our blog page. Click here to read about setting up the blog page.
Navigation
We have added products to your shop and pages to your website. We need to make sure that the pages and products are accessible. For that we need to setup the navigation of the website through navigation menus. Click here for more details.
Adding Icon to Menu Item
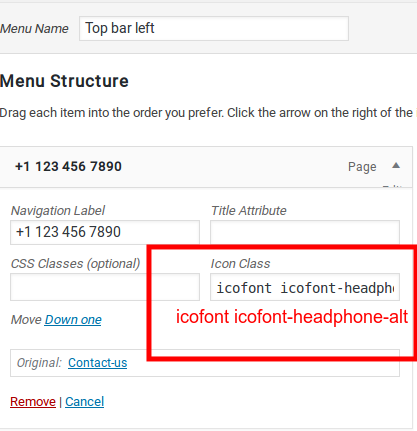
- Go back to Appearance > Menus.
- Click on the caret on the top-right of menu item that contains the megamenu subitem to expand it.
- In the Icon Class text box, enter the icon name. For ex: icofont icofont-headphone-alt is a icon class. This will make the menu item to display with icon.
- Click on Save Menu.
Output of Adding Icons to Menu Items
![]()
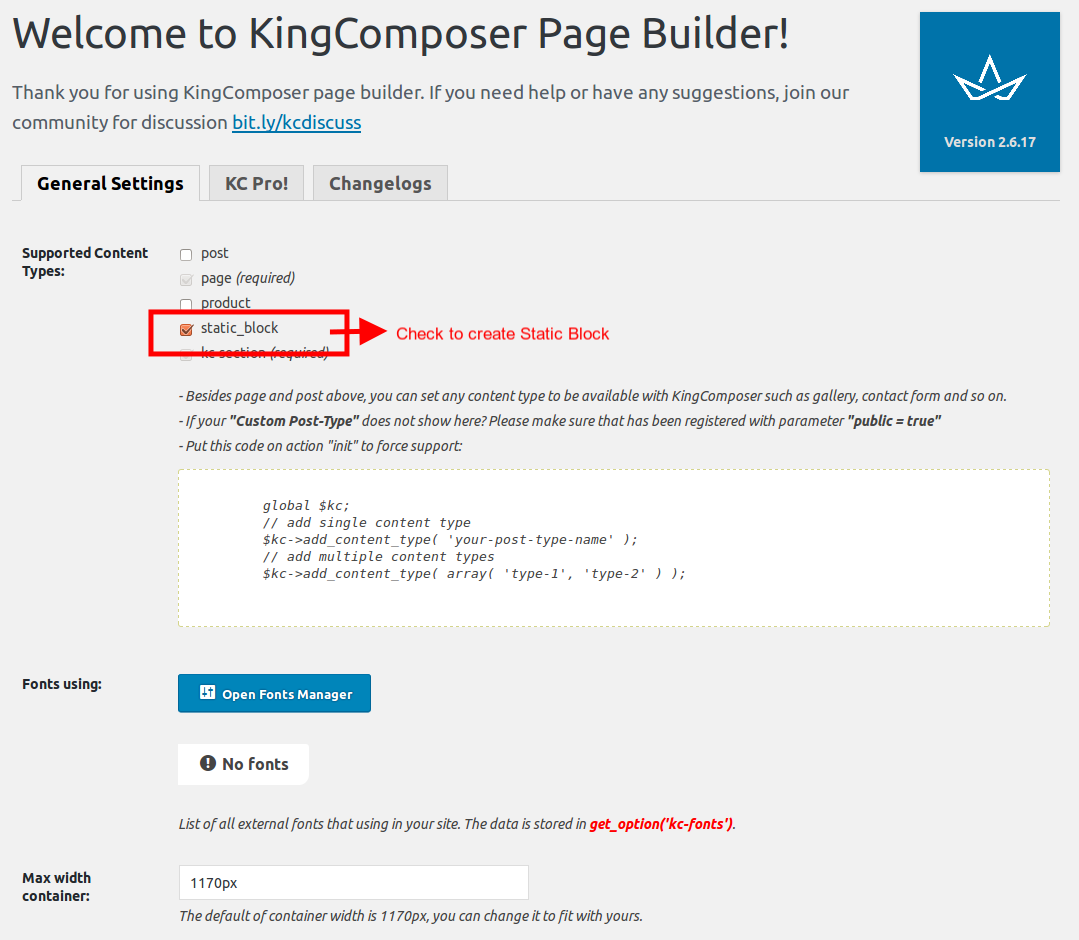
King Composer Setup
Navigate to KingComposer > General Settings here enable static_block option, which is used to built Static Content.