Options that apply to shop page and other pages related to shop. You can access this option from Sinbad > Shop
General
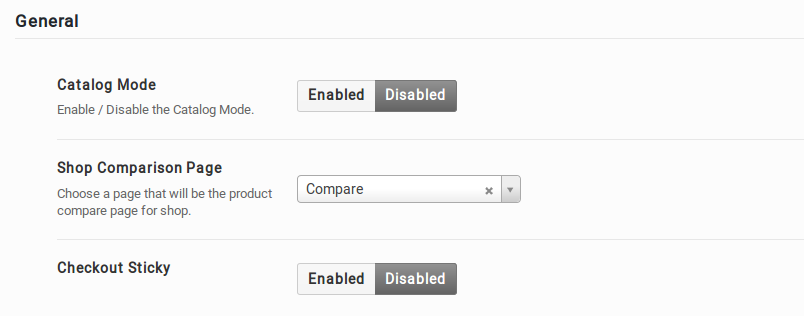
Catalog Mode
Enable / disable catalog mode. When enabled the catalog mode will remove shopping cart functionalities by replacing all Add to Cart buttons with View Product button which will link to Single Product page. The header mini cart will also be removed.
Shop Comparison Page
Assign a page as Shop Comparison page. The page assigned here will be used in the header compare link.
Checkout Sticky Payment
Enable / disable sticky payment in Checkout page.
Shop/Catalog Pages
Product Archive Views
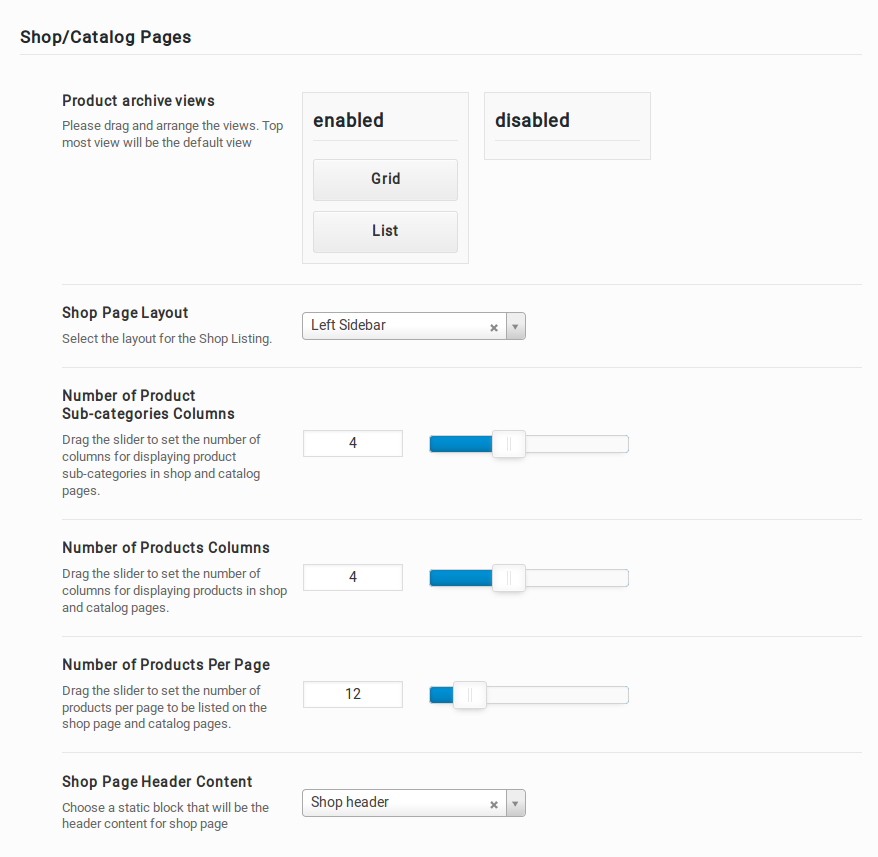
Product Archive / Shop Page has 2 different views Grid and List View. You can drag and arrange the views. Top most view will be the default view.
Shop Page Layout
In Sinbad theme, the Shop Page can be displayed in 3 available layouts which are :
- Left Sidebar – This is the default layout of Shop page in our theme. It has a content section occupying 75% of the screen and a widgetized sidebar section to its left occupying 25% of the screen.
- Right Sidebar – This layout is same as the Left Sidebar layout except that the sidebar section is in the right side of the screen.
- Fullwidth Top Filter – This layout does not contain any sidebars. The entire screen has the content section.
You can select the layout of the shop from Sinbad > Shop > Shop/Catalog Pages > Shop Page Layout.
Number of Product Sub-categories columns
Drag the slider to set the number of columns for displaying product sub-categories in shop and catalog pages.
Number of Products Columns
In Product Archive/Shop Page, product items can be displayed by choosing number of columns .Drag the slider to set the number of columns for displaying products in shop and catalog pages.
You can select the Product Columns under Sinbad > Shop > Shop/Catalog Pages > Number of Products Columns.
Number of Products per page
Once we have chosen the shop layout, we’ll have the number of product items displayed per row. The number of product items per page is recommended to be a multiple of the number of product items displayed per row.
You can set the number of items displayed from Sinbad > Shop > Shop/Catalog Pages > Number of Products Per Page.
Shop Page Header Content
Choose a static block that will be the header content for shop page
Single Product Page
Single Product Style
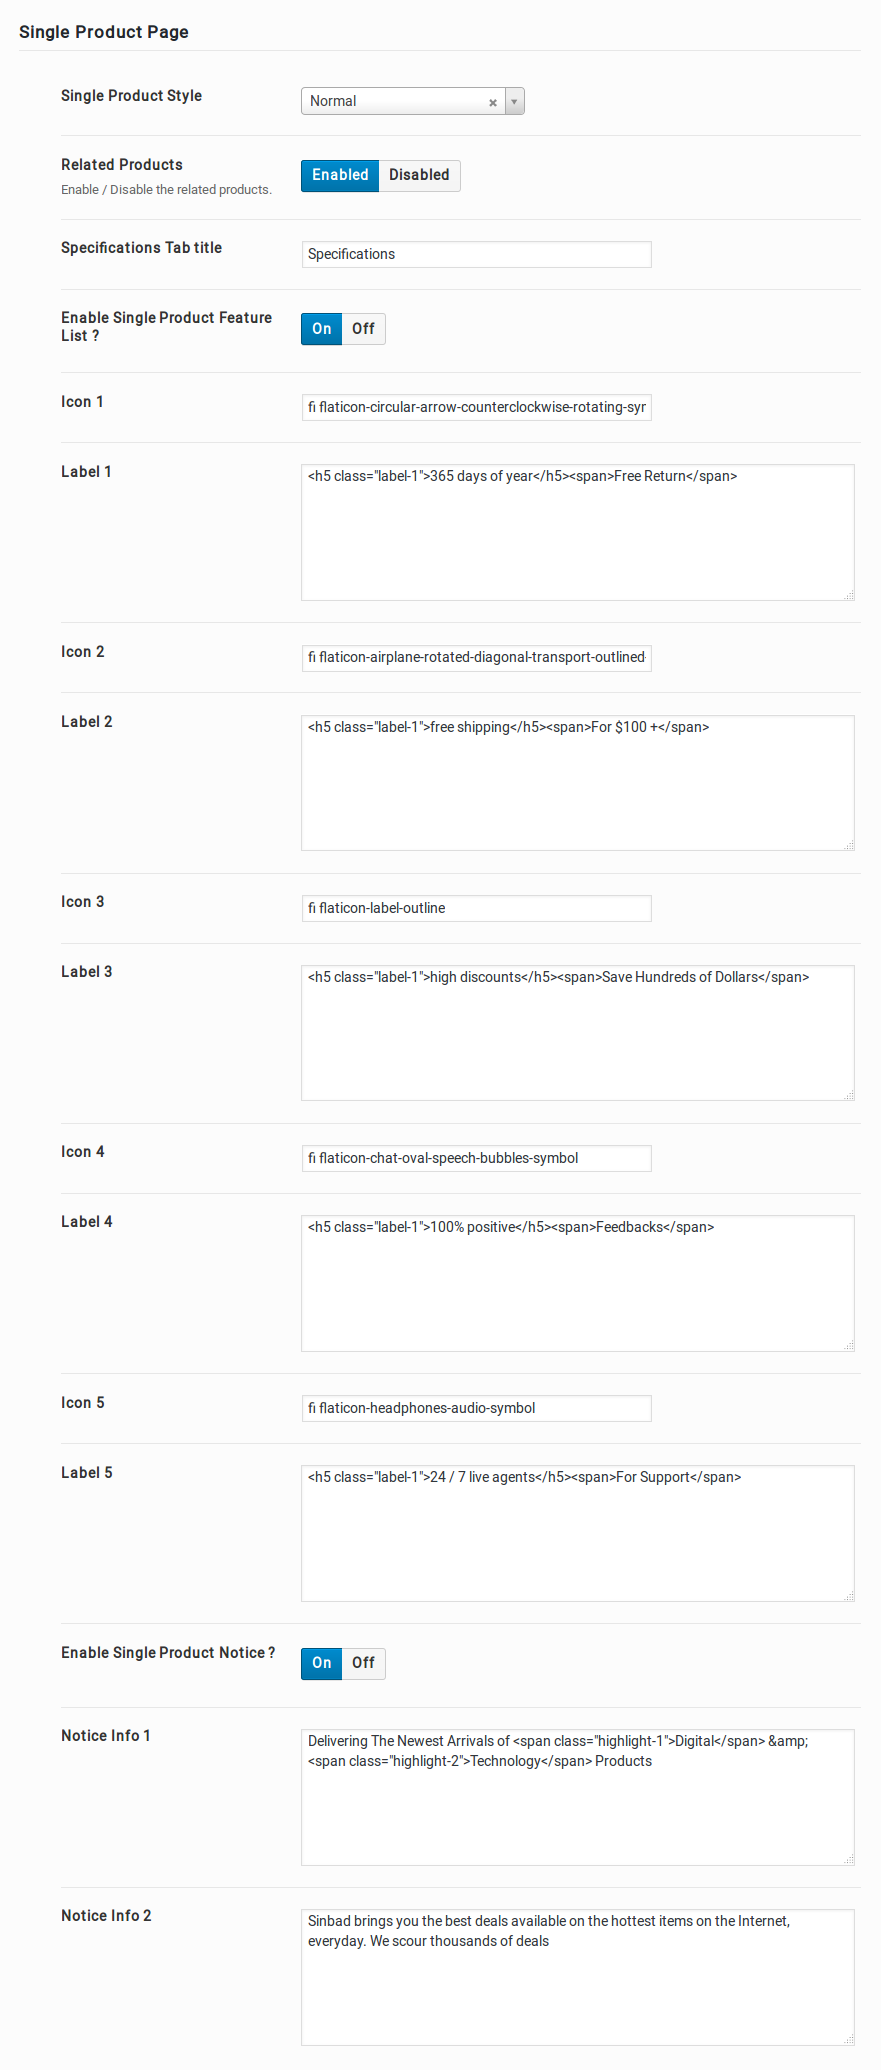
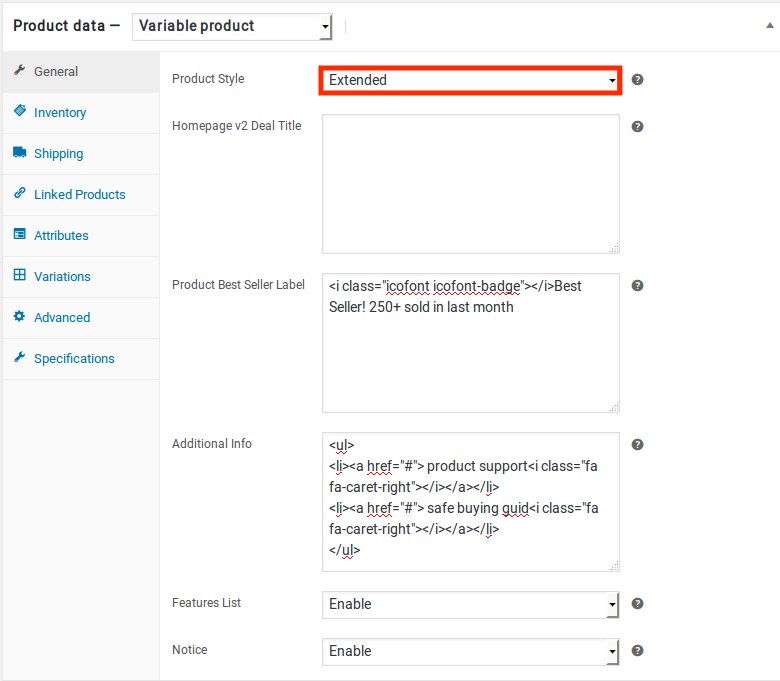
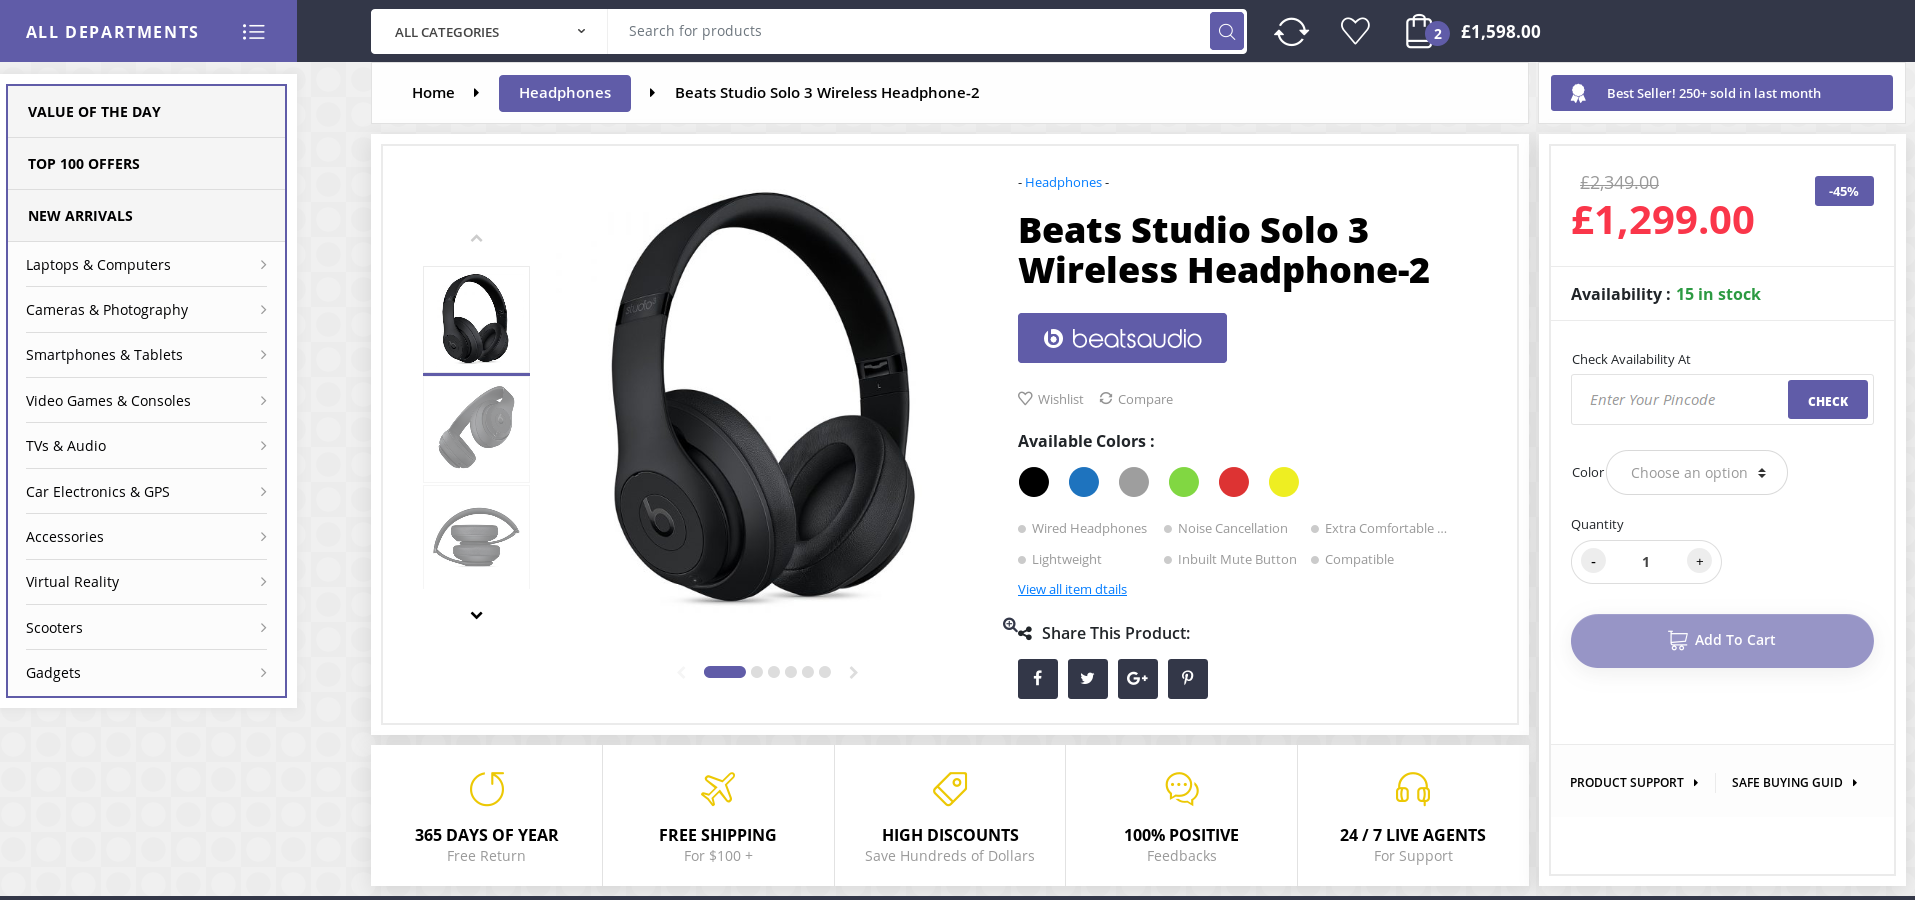
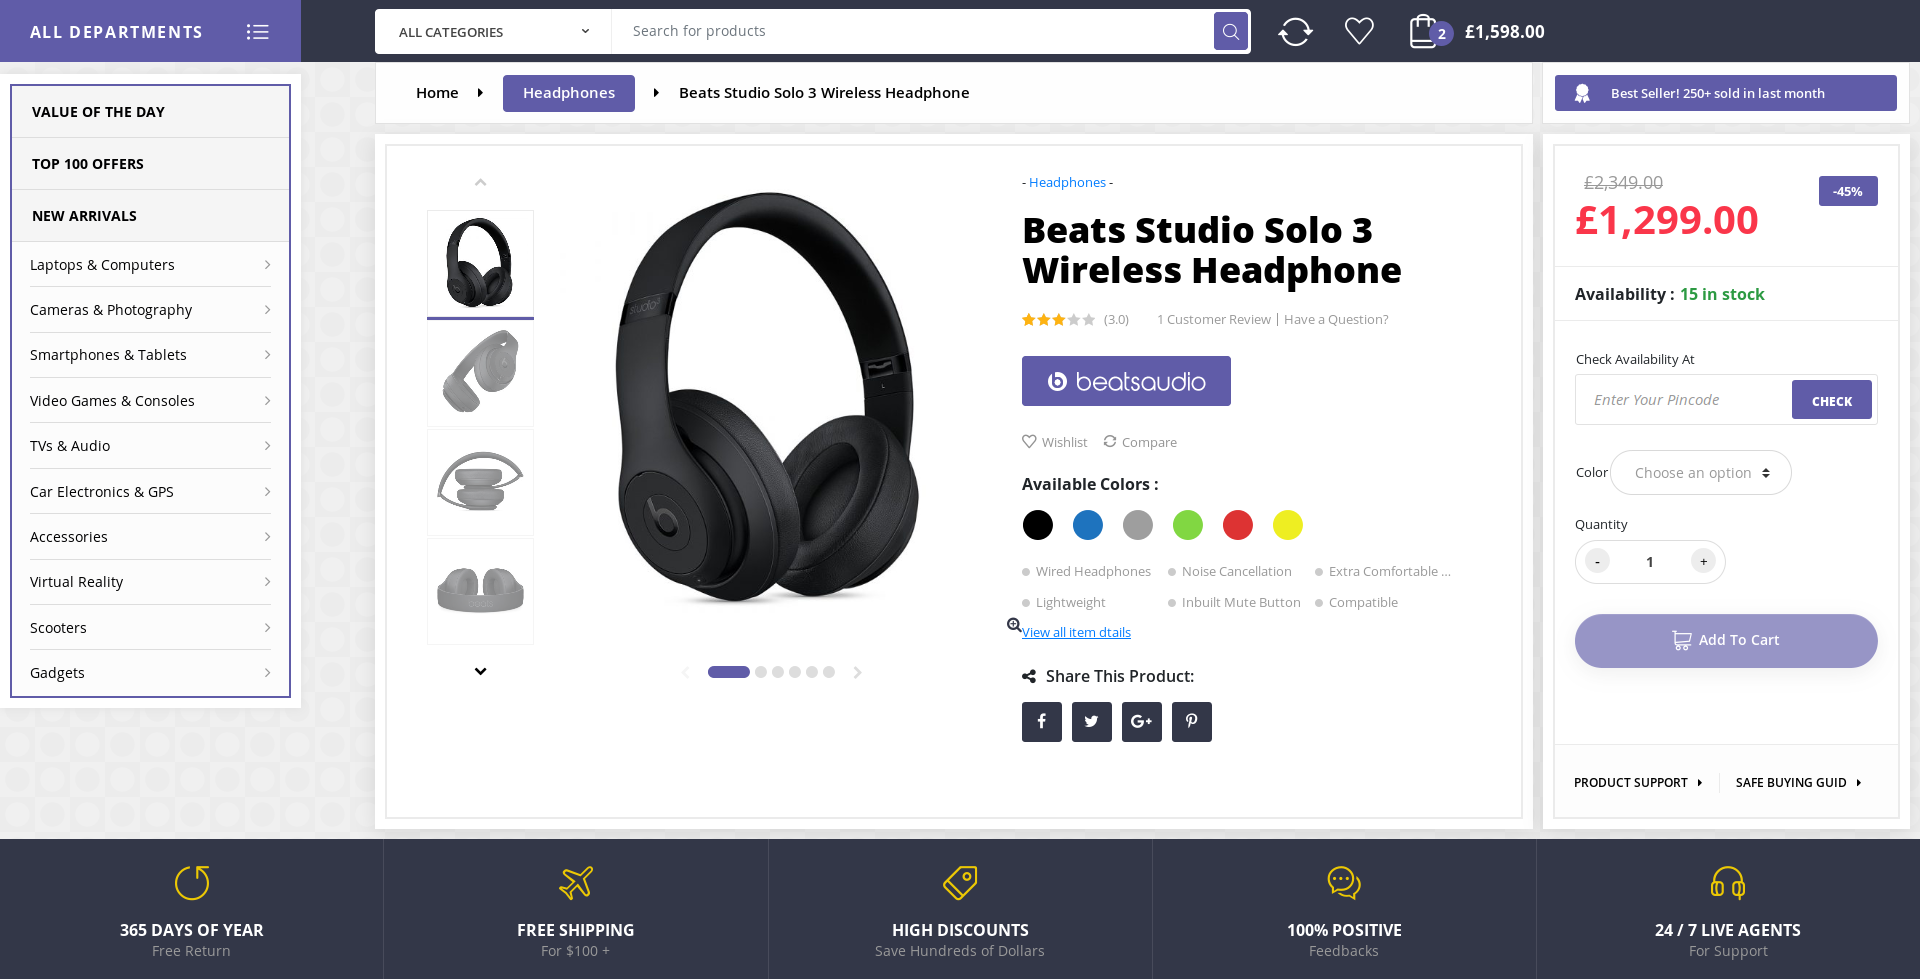
In Sinbad theme, Single Product Page has 2 different styles.One is Extended and another one is Normal Style. Otherthan Theme Option, you can also select the Single Product Style through Add new Product or Edit product page.
Choosing Single Product Style in Add new product or Edit product Page
- Navigate to WooCommerce > Products.
- Select the Add Product button or Edit an existing product. The Product Data displays.
- Select the Product Style under General Tab
Here is the screenshot for your reference:
Output of Extended Style
Output of Normal Style
Related Products
Enable the Related Products option to display related products in Single Product Page.
Specifications Tab title
Apart from default WooCoommerce Tabs, we add an extra tab named Specifications which create for the benefit of the user to show more information about their products. Here enter the Specification Tab title which is displayed in Single Product page.
Enable Single Product Feature List
Enable / disable single product feature list. If enable feature list option, enter feature list icon and label.
Enable Single Product Notice
Enable / disable single product notice block. If enable notice block option, enter notice information in the text field.
My Account page
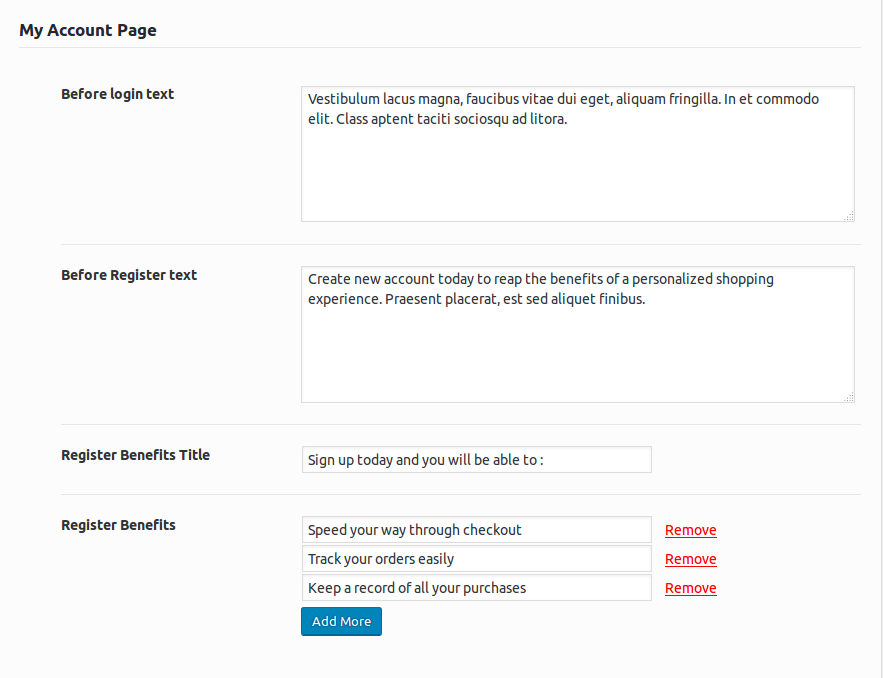
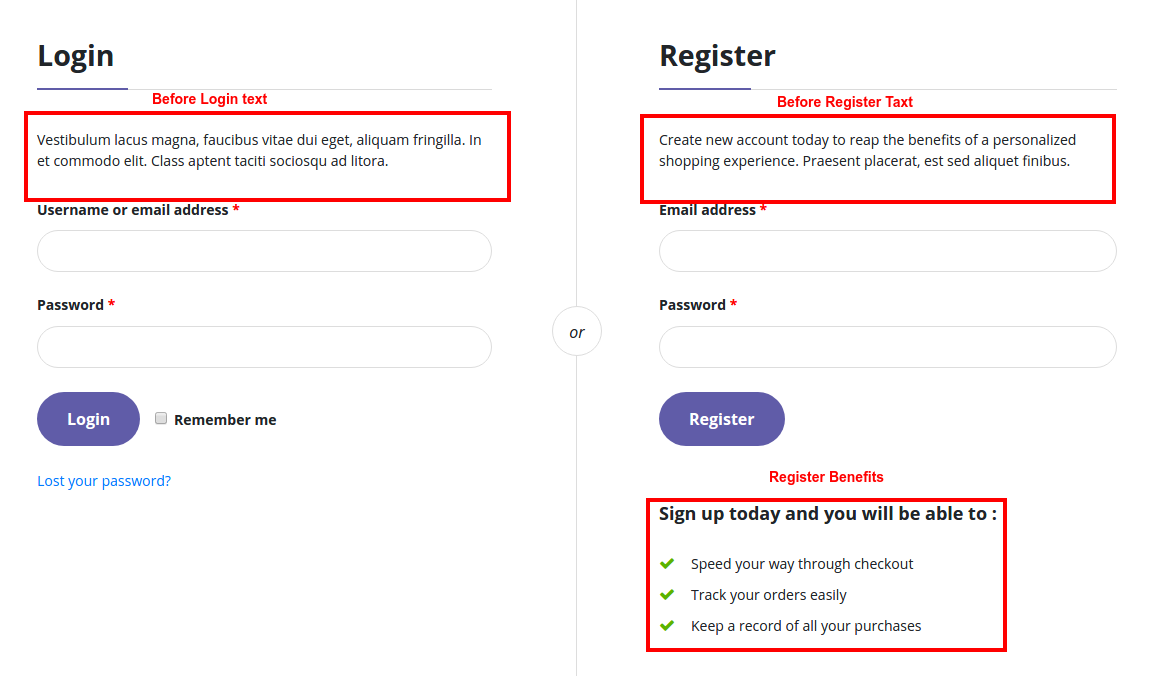
Before login text
Enter the login text which is displayed before Woocommerce Login Form in My Account Page. The default text is Vestibulum lacus magna, faucibus vitae dui eget, aliquam fringilla. In et commodo elit. Class aptent taciti sociosqu ad litora.You can change the text as you wish.
Before Register text
Enter the registration text which is displayed before Woocommerce Registration Form in My Account Page. The default text is Create new account today to reap the benefits of a personalized shopping experience. Praesent placerat, est sed aliquet finibus.You can change the text as you wish.
Register Benefits Title
Enter register benefits title which is displayed after Registration Form in My Account Page. The default text is Sign up today and you will be able to : You can change the text as you wish.
Register Benefits
Enter the Register Benefits list items.
Output of My Account Page
