MAS Videos has a built-in video CSV importer.
Import or update hundreds or thousands of videos in your MAS Videos site with a single CSV.
- First-time users get started more quickly by exporting and importing videos during setup
- Existing users can update tens or hundreds of videos with new info
Create your CSV
To import new videos or update existing videos, you need a CSV containing your video information. You can:
Guidelines
General
- CSVs should be in UTF-8 format.
- Dates should be defined for the store’s local timezone.
- Use 1 or 0 in your CSV, if importing a Boolean value (true or false)
- Multiple values in a field get separated with commas.
- Wrapping values in quotes allows you to insert a comma.
- Prefix the id with
id:if referencing an existing video ID. For example:id:100 - Custom meta is supported/imported but only plain text – no support for JSON or Serialized data.
- Taxonomy term hierarchy is denoted with
>, terms are separated with commas. - Draft videos are not exported, only published and privately published videos.
Images
- Images need to be pre-uploaded or available online to import to your site.
- External URLs are supported and imported into the Media Library if used.
- You can define the filename if the image already exists in the Media Library.
Import
Adding New Videos
First-time and existing users using MAS Videos can use the CSV to add new videos with one upload.
1/ Go to: Tools > Import > MAS Videos Videos (CSV).
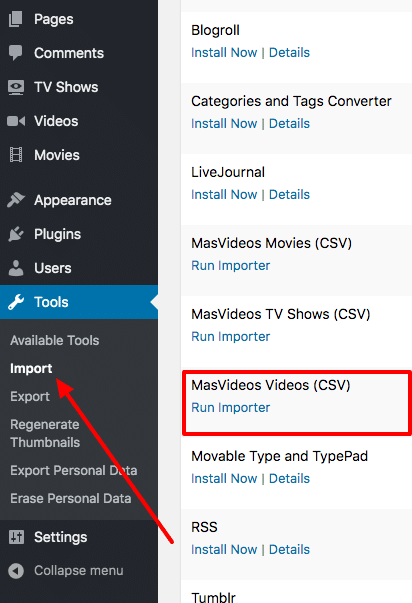
2/ Select Run Importer link. The Upload CSV File screen displays.
3/ Select Choose File and the CSV you wish you use.
CSV delimiter (Advanced option): Generally CSV elements are separated by a comma. If you are using a different delimiter in your file, you can set it here.
Tick the checkbox for Update Existing Videos.
4/ Continue.
The Column Mapping screen displays, and MAS Videos automatically attempts to match or “map” the Column Name from your CSV to Fields.
5/ Use dropdown menus on the right side to adjust fields or indicate ‘Do not import.’
*Any unrecognized columns will not be imported by default.
6/ Select Run the Importer.
7/ Wait until the Importer is finished. Do not refresh or touch the browser while in progress.