To create a new menu :
- Navigate to Appearance > Menus.
- Click on Create a new menu, give the menu a name.
- Now to the left are available menu items that can be added to the screen, check the items you want to add and click on Add to Menu button.
- The items are now added to Menu, you can then sort and lay the menu items in levels by drag and drop.
- Click on Save Menu.
- After you have saved the menu, hook the menu to any of the available Electro Nav menu locations.
Theme Locations in Electro
Electro has ten navigation menu locations. They are :
- Off Canvas menu
- Top Bar Left
- Top Bar Right
- Primary Nav
- Navbar Primary
- Secondary nav
- Departments Menu
- All Departments Menu
- Blog menu
- Mobile Handheld Department
Enabling CSS Classes Field, Static Content Blocks & Product Category Menu options
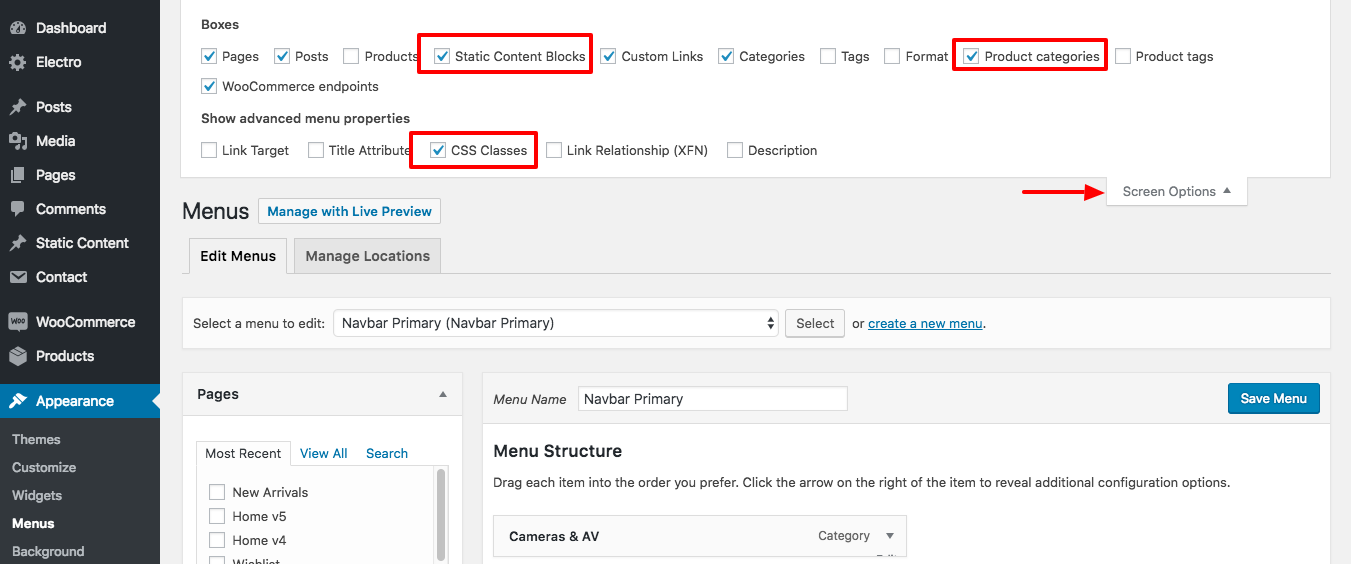
By default CSS Classes field, Static Content Blocks and Product Categories menu items may not be available. The will have to be enabled. To enable it please click on Screen Options at the top right screen of Appearance > Menus page. In the pull down menu that appears, check CSS Classes in Show Advanced menu properties. Please also check Static Content Blocks and Product Categories in Boxes. We’ve explained it in the screenshot below.
Add Icons to Menu items
Output
![]()
Settings
![]()
- Navigate to Appearance > Menus.
- Click on the caret on the top-right of menu item that contains the megamenu subitem to expand it.
- In the Icon Class text box, enter the icon name as you wish.for ex: ec ec-map-pointer.
- Click on Save Menu.
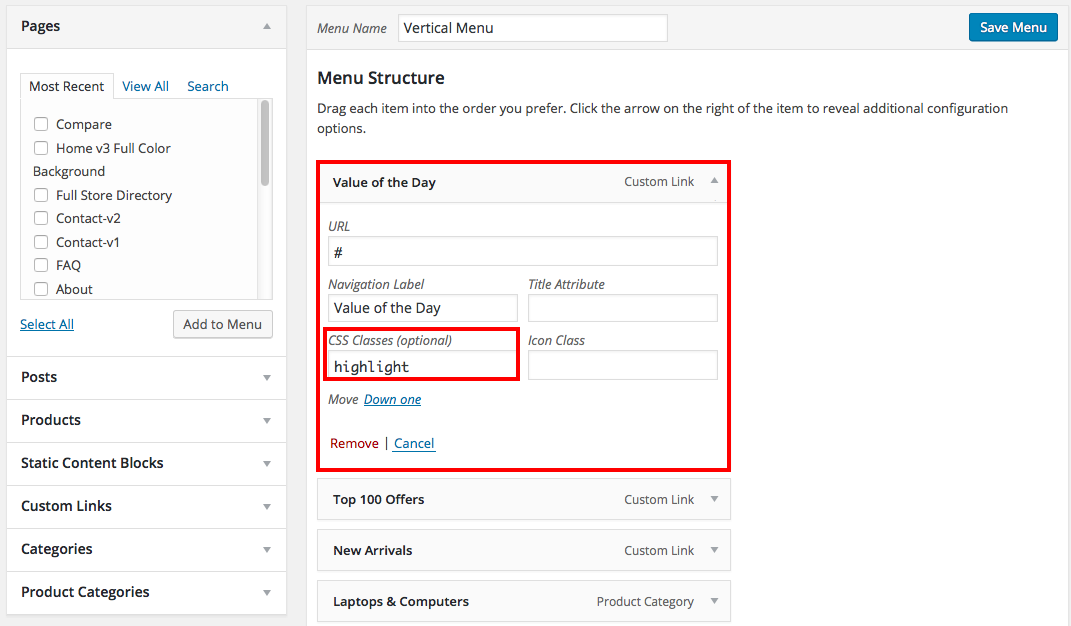
To make the Menu Item Red in Color:
Output

Settings
- Go back to Appearance > Menus.
- Click on the caret on the top-right of menu item that contains the megamenu subitem to expand it.
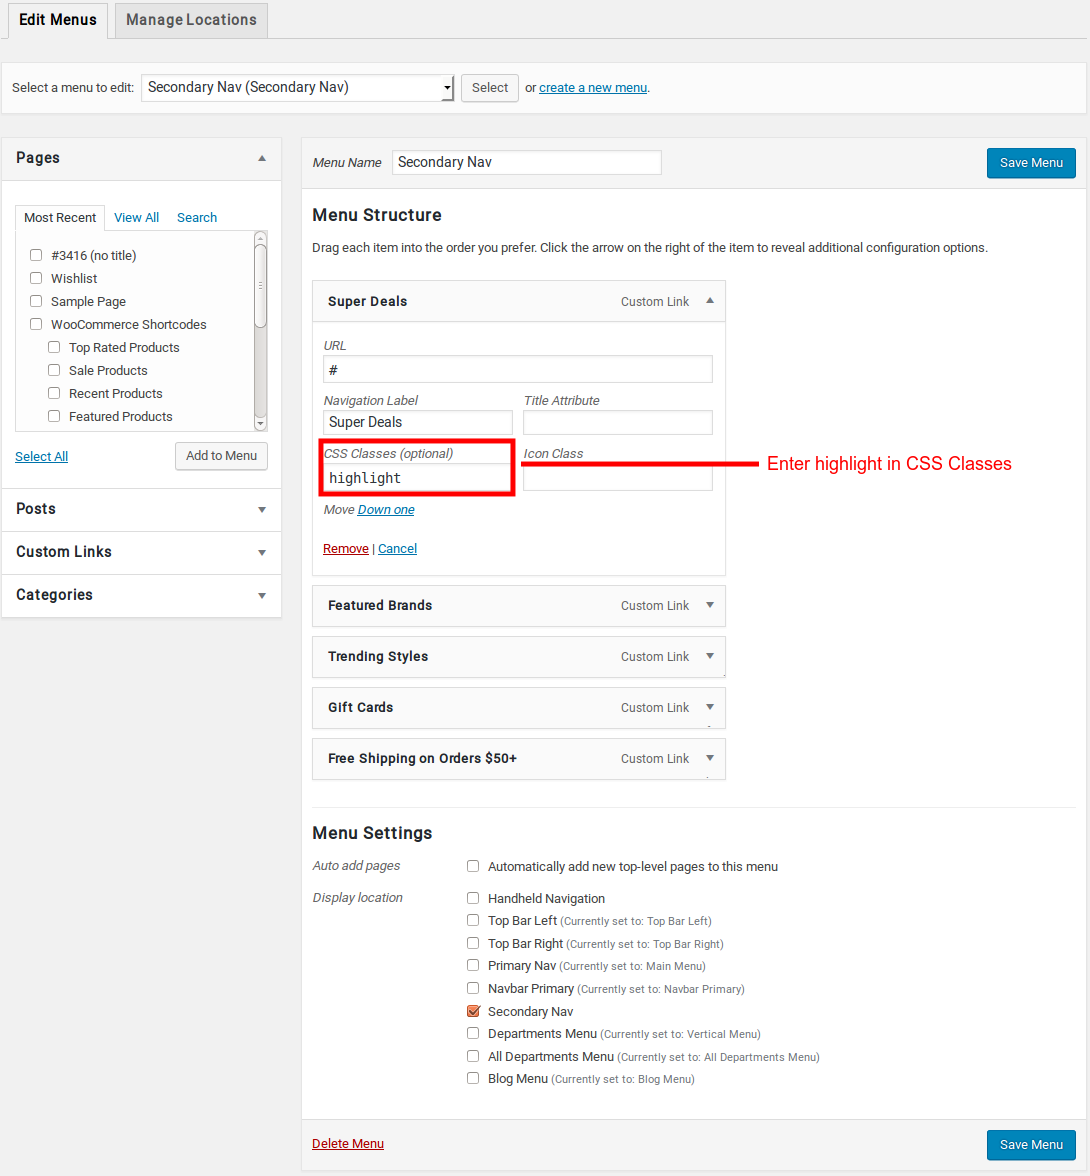
- In the CSS Classes text box, enter highlight. This will make the menu item RED color in Secondary menu.
- If the CSS Classes field is not visible. Click on Screen Options on the top-right corner of the screen and check on CSS Classess under Show advanced menu properties.
- Click on Save Menu.
To make the Menu Item as Highlight or Bold
Output

Settings
- Go back to Appearance > Menus.
- Click on the caret on the top-right of menu item that contains the megamenu subitem to expand it.
- In the CSS Classes text box, enter highlight. This will make the menu item as BOLD.
- If the CSS Classes field is not visible. Click on Screen Options on the top-right corner of the screen and check on CSS Classess under Show advanced menu properties.
- Click on Save Menu.
Split the Menu Item in right side
Output

Settings
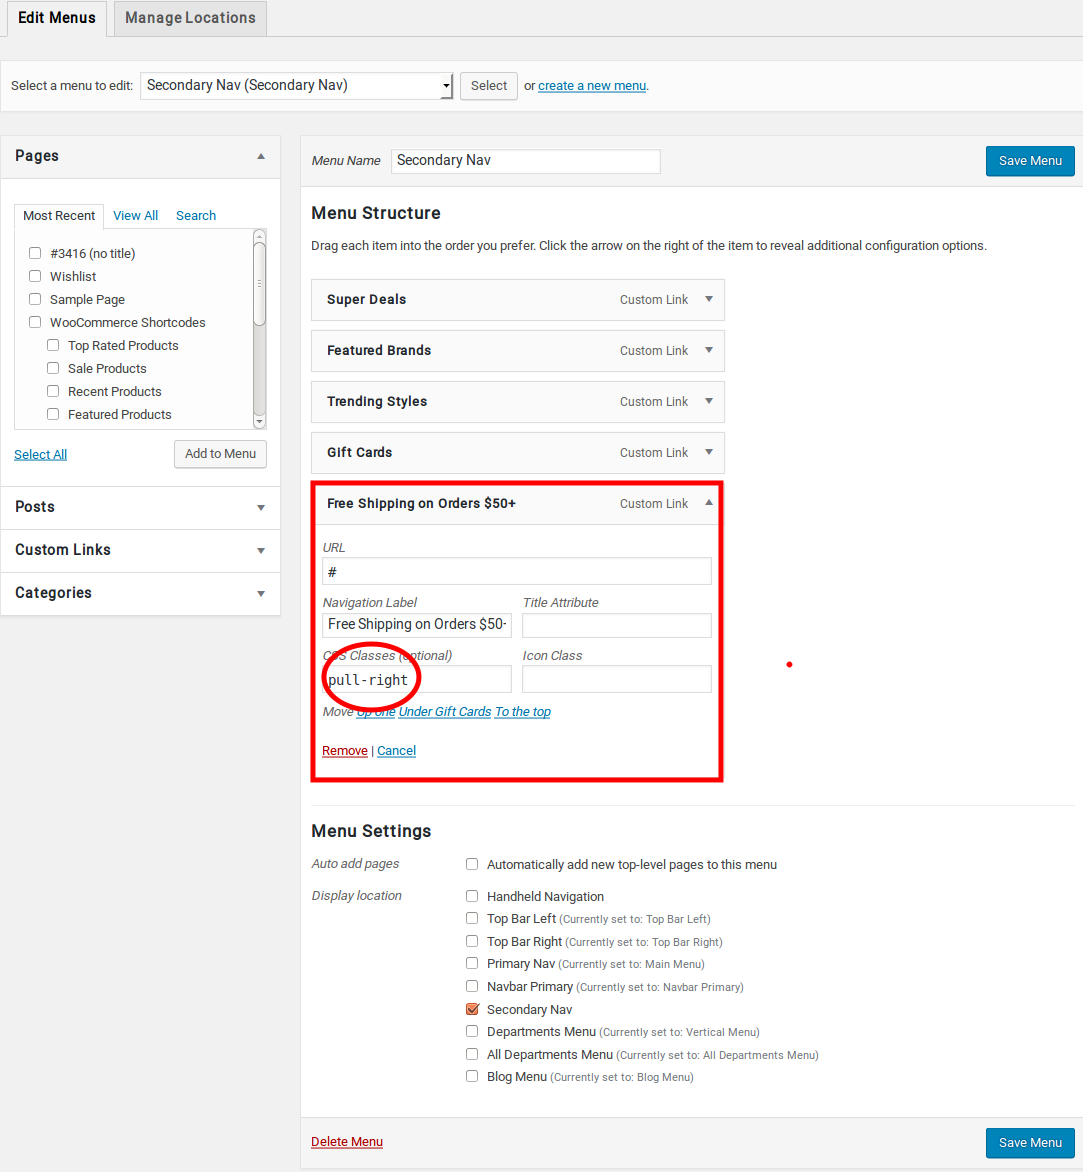
- Go back to Appearance > Menus.
- Click on the caret on the top-right of menu item that contains the megamenu subitem to expand it.
- In the CSS Classes text box, enter pull-right. This will make the menu item to float in right side.
- If the CSS Classes field is not visible. Click on Screen Options on the top-right corner of the screen and check on CSS Classess under Show advanced menu properties.
- Click on Save Menu.
Making the megamenu dropdown as full-width
Output

Settings
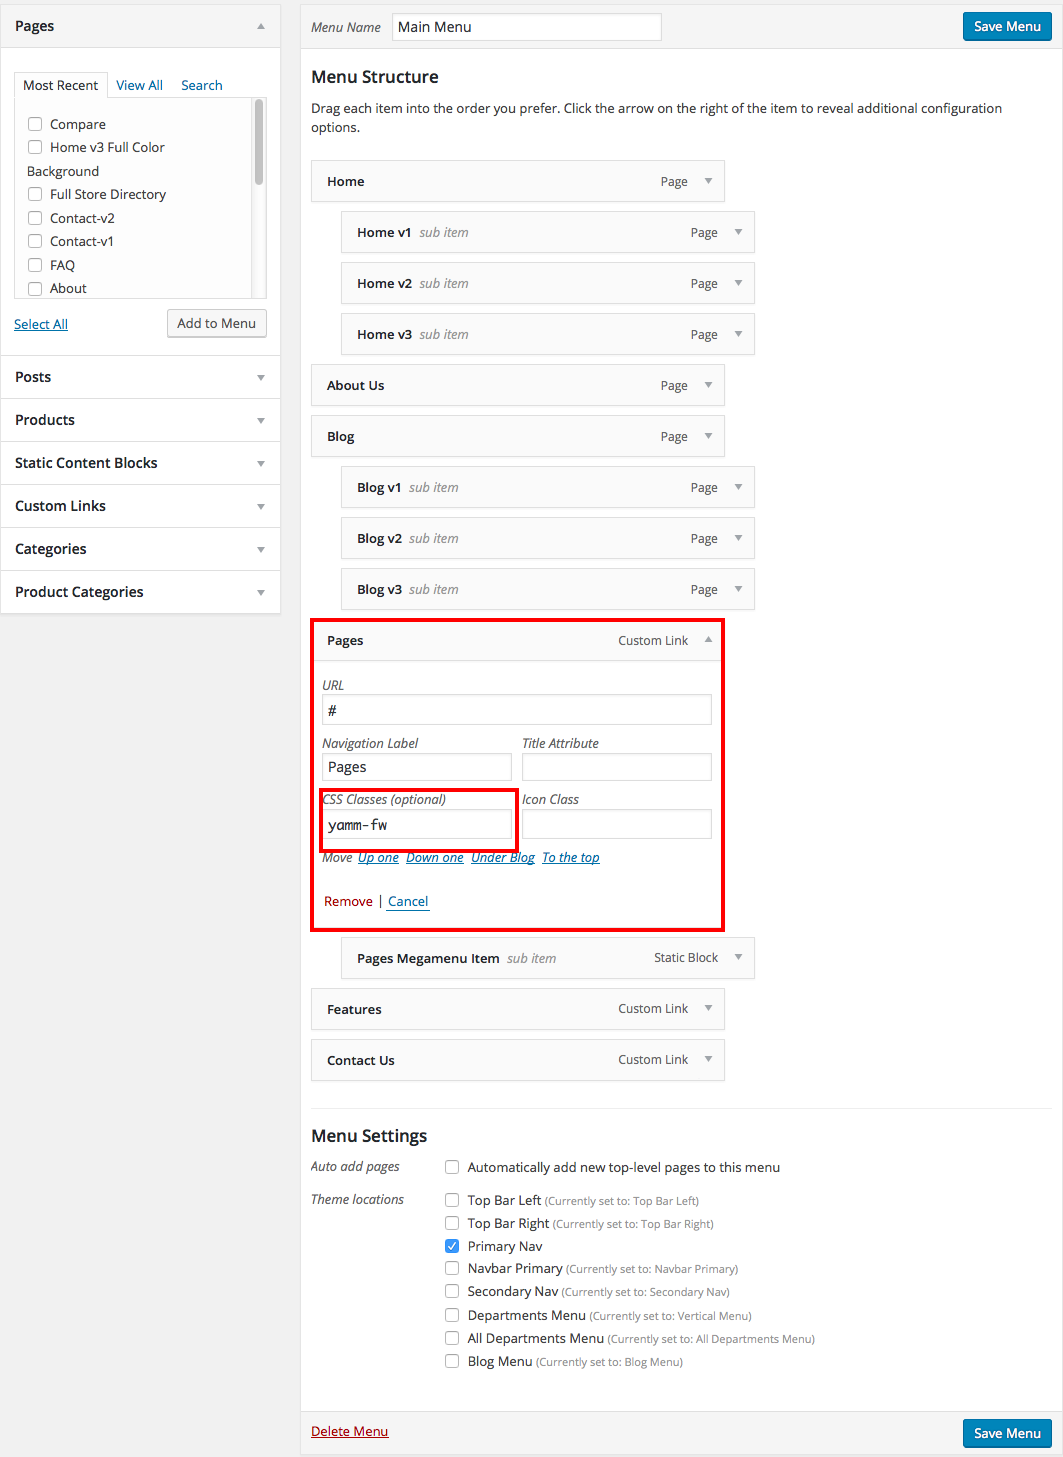
The megamenu now looks advanced and neat. What if we want the megamenu to be full width ? It is easy.
- Go back to Appearance > Menus.
- Click on the caret on the top-right of menu item that contains the megamenu subitem to expand it.
- In the CSS Classes text box, enter yamm-fw. This will make the subitem extend to full width of the container.
- If the CSS Classes field is not visible. Click on Screen Options on the top-right corner of the screen and check on CSS Classess under Show advanced menu properties.
- Click on Save Menu.
Making the megamenu dropdown as 3 Half of the width
Output

Settings
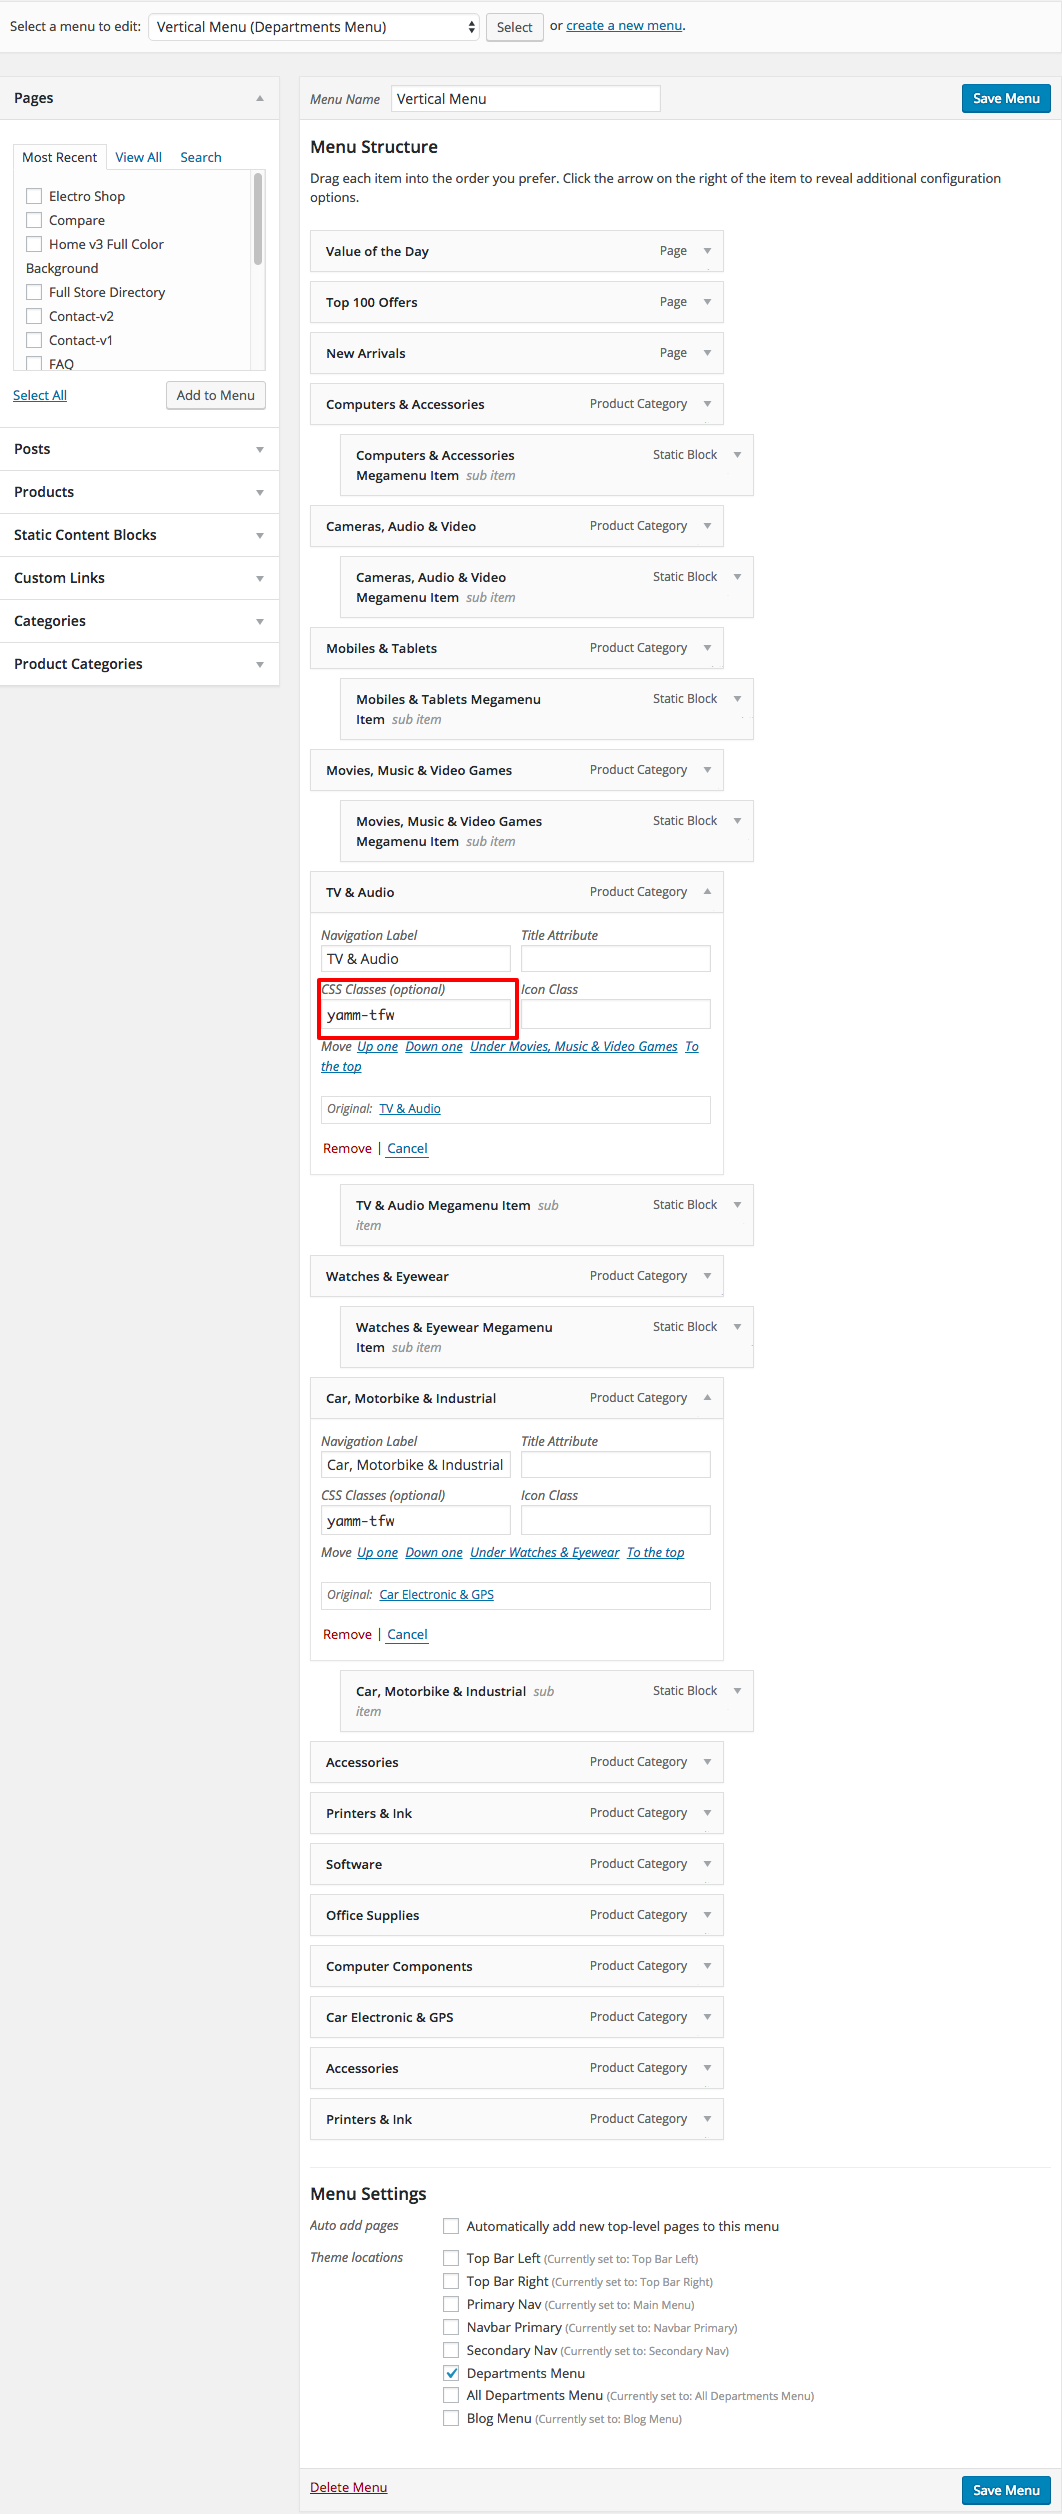
- Go back to Appearance > Menus.
- Click on the caret on the top-right of menu item that contains the megamenu subitem to expand it.
- In the CSS Classes text box, enter yamm-tfw.
- This will make the subitem extend to 3 half-width of the container.
- If the CSS Classes field is not visible. Click on Screen Options on the top-right corner of the screen and check on CSS Classess under Show advanced menu properties.
- Click on Save Menu.
Making the megamenu dropdown as half of the width
- Go back to Appearance > Menus
- Click on the caret on the top-right of menu item that contains the megamenu subitem to expand it.
- In the CSS Classes text box, enter yamm-hw.
- This will make the subitem extend to half of the container.
- If the CSS Classes field is not visible. Click on Screen Options on the top-right corner of the screen and check on CSS Classess under Show advanced menu properties.
- Click on Save Menu.
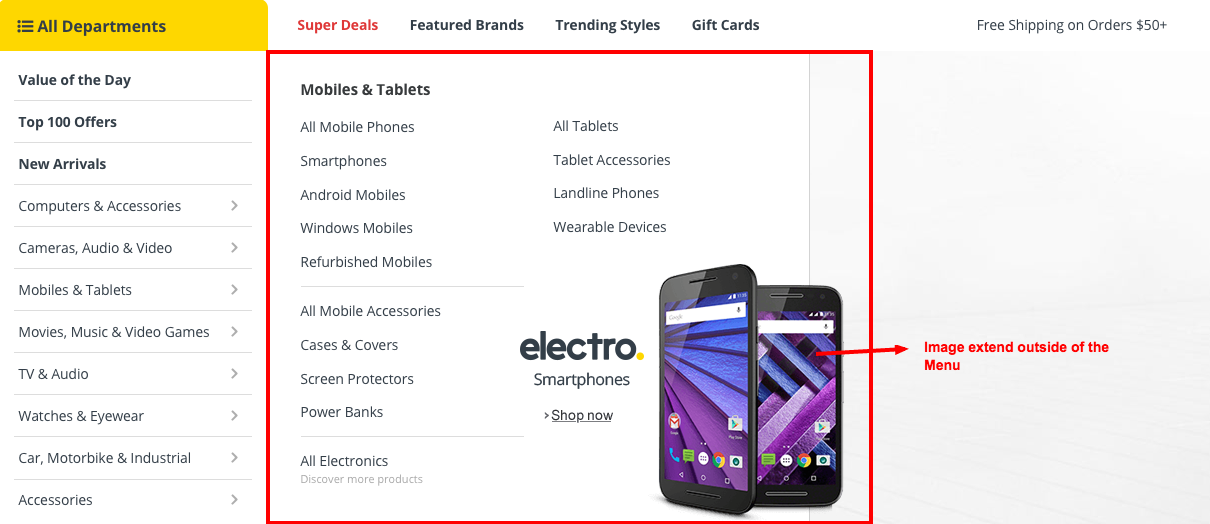
Adding Class Name for Single Image which extend outside of the content area in Vertical Menu
Output
Settings
- Navigate to Static Content > Add New.
- Give it a title, lets say “Mobiles & Tablets Megamenu Item“. The title is not used anywhere in displaying the menu.
- Click on Backend Editor. It will display Visual Composer Backend Editor. We will use this back end editor to build our Mobiles & Tablets Megamenu Item.
- Mobiles & Tablets Megamenu Item has 2 rows.
- First row has Single Image Setting. Here is the screenshot for Single Image Setting.
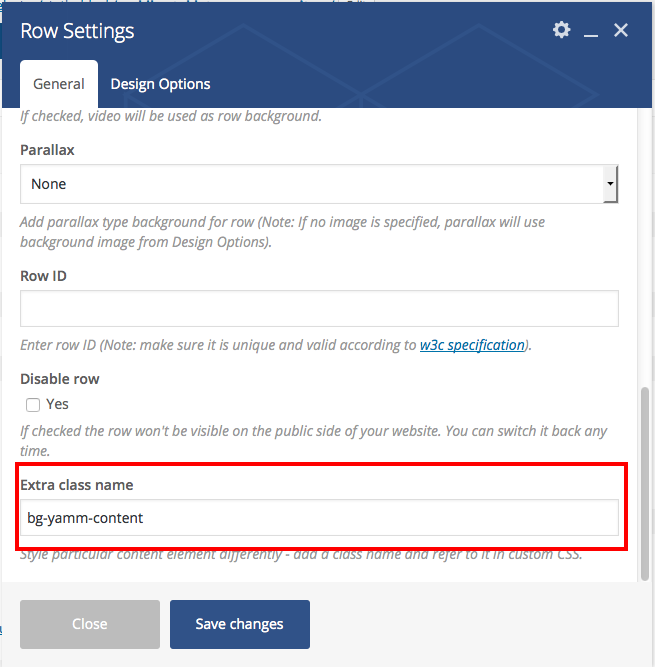
- On the Row settings of the Single Image Block, add the class name bg-yamm-content in Extra Class Name option. Here is the screenshot for your refenece
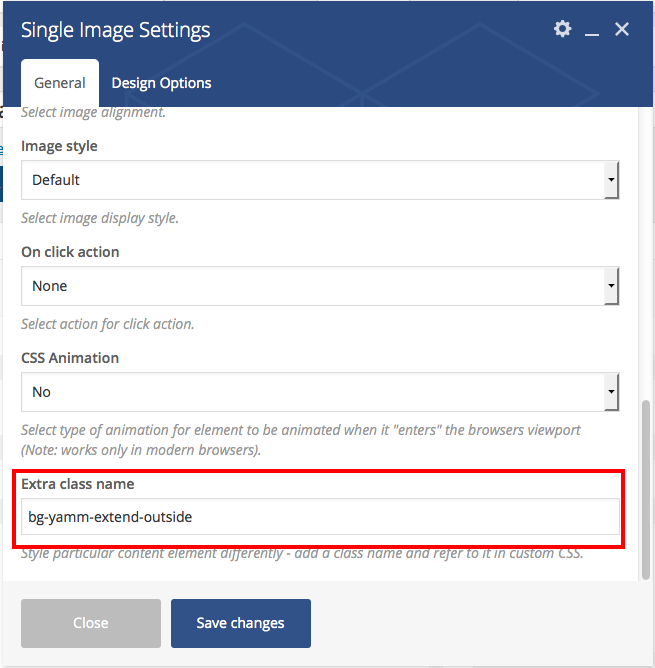
- In Single Image Setting upload the image and remember to add the class name bg-yamm-extend-outside in Extra Class Name Option which makes the image to extend outside of the Menu Container. Here is the screenshot for the reference